Event badge templates and print guidelines
Print-ready templates with the bleed and safety areas already set, and a guide to preparing your artwork.

<<Full Name>>
<<Position>>
Sarah Chen
VP Engineering
Download your template
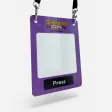



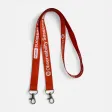
Safety area: 3mm top and bottom.
Anatomy of a print-ready badge
Three zones, all pre-marked in the template. Set your document to the bleed size and keep everything that matters inside the safety area.
Sarah Chen
VP Engineering
Cut lines final size
This is where we trim. Keep decorative elements inside this boundary.
Sarah Chen
VP Engineering
Bleed area +3 mm
Extend your background to the bleed edge to avoid white borders after trimming.
Sarah Chen
VP Engineering
Safety area 5 mm inside
Keep all text, logos, and key content inside the safe zone.
Design checklist and principles
What a print-ready file needs compared to what goes wrong without it.
Sarah Chen
VP Engineering
Sarah Chen
VP Engineering
Set colours in CMYK
No RGB, no spot or Pantone colours.

Sarah Chen
VP Engineering
Sarah Chen
VP Engineering
Images at 300dpi or higher
Lower resolutions print fuzzy and soft.
Sarah Chen
VP Engineering
Sarah Chen
VP Engineering
5mm safety area
Keep text, logos and other key elements inside the safety area.
Sarah Chen
VP Engineering
Sarah Chen
VP Engineering
Add 3mm bleed
Extend backgrounds past the trim so no white edge shows.
Sarah Chen
VP Engineering
Sarah Chen
VP Engineering
Leave out crop marks
And print marks. We add those at production.
Sarah Chen
VP Engineering
Sarah Chen
VP Engineering
Use fonts of 8pt or larger
And keep text fields live, not outlined.
Sarah Chen
VP Engineering
Sarah Chen
VP Engineering
Use rich black for large areas
Large areas: 60 / 40 / 40 / 100. Text: plain black, 0 / 0 / 0 / 100.
Sarah Chen
VP Engineering
Sarah Chen
VP Engineering
Keep lines 0.5pt or thicker
Thinner lines can break up on press.
Start from our template so the size and 3mm bleed are already correct.
Sizes at a glance
Set your document to the bleed size. The trim size is the finished badge.
900 × 26mm with bleed · safety 3mm top and bottom · shown shortened
Not sure your file is right?
Send it over. We check size, bleed, resolution and colour before anything prints, and send a named proof if you'd like to see one.
Template and artwork questions
If you can't find what you're looking for, get in touch.
What size should my event badge be?
Most badges print at one of two trim sizes: small (74×105mm) or large (100×140mm or 105×148mm, depending on the material). Add 3mm of bleed on every side. Each template above shows its exact size, including bleed.
Do I have to add bleed?
Yes, wherever a colour or image reaches the edge. 3mm on each side stops a thin white line appearing when the badge is trimmed. Our templates already mark the bleed area for you.
What colour mode should I use?
CMYK. RGB and spot or Pantone colours can shift on press, so set your document to CMYK before you start and the colours you see will match what we print.
Can you check my artwork before printing?
Yes. Send your file and we look it over for size, bleed, resolution, and colour before anything goes to production. If you ask for a proof, you get it within one business day.
I don't have design software. Can you help?
We don't design badges from scratch, but we fix small things like bleed, sizes and file issues before printing. The PDF templates open in most tools, and for name badges we personalise every badge from a spreadsheet you send, so you only design the layout once.
What file should I send you?
A print-ready PDF or an Adobe Illustrator (.ai) file, built on our template: CMYK, 3mm bleed, no crop marks, images at 300dpi or higher, and text left live rather than outlined.